


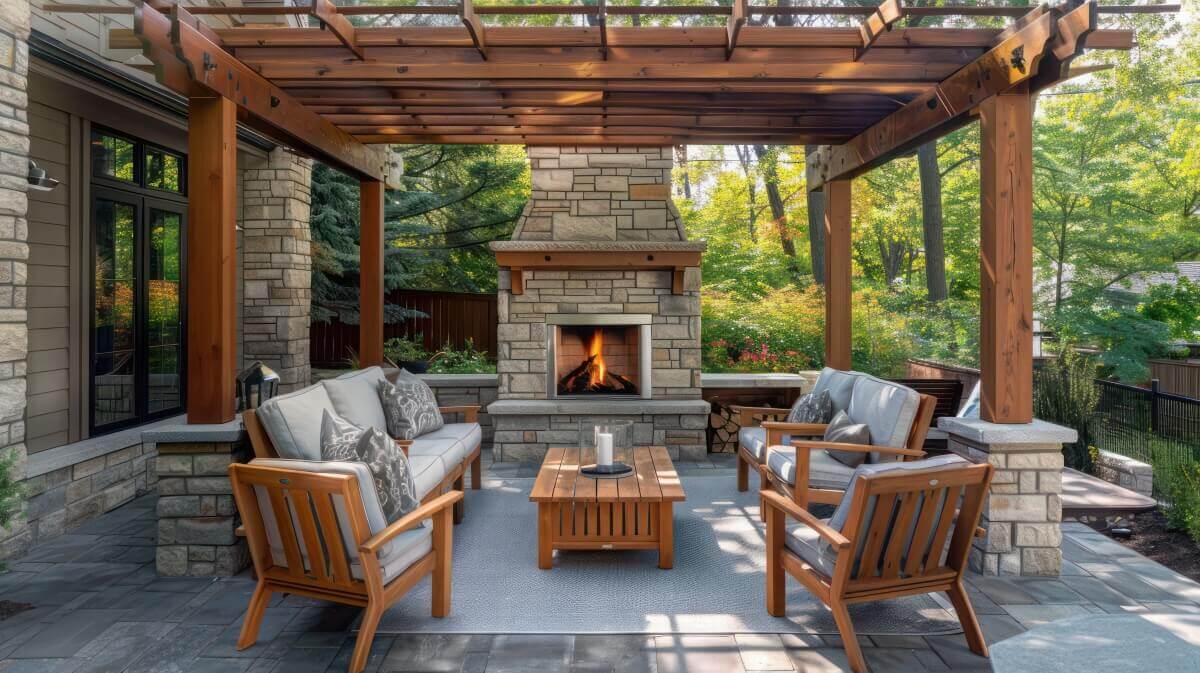
It is well worth installing a wooden patio pergola yourself, as this reduces labour costs and allows you to precisely adapt the structure’s geometry and the positioning of the posts to the conditions of your patio. When using KVH or BSH (GL24) structural timber and ensuring correct anchoring to adjustable steel footings set in concrete, the stability achieved is comparable to that of a professional installation. It is crucial to prepare a load-bearing, level foundation and to maintain the diagonal bracing and cross-bracing, as this determines the structure’s wind resistance and the behaviour of the timber when used outdoors.
Can you install wooden patio pergolas yourself, and is it worth it?
Contrary to what you might think, wooden patio pergolas are not something that’s exclusively for professional fitters. If you have the basic tools, a patch of level ground and know how to cut to size, fitting one yourself can lead to real savings – and, at the same time, the satisfaction of knowing that your patio has been built exactly to your specifications.
At Dąb Gaj Wood, I often speak to customers who want to understand what the installation process involves, step by step, and what they can do themselves to avoid overpaying and making mistakes right from the start.
If you are considering wooden pergolas for the terrace, it’s worth approaching the project as if it were a small-scale building project: plan the dimensions, foundations, anchoring and securing of the timber, as these factors determine its durability.
Is it worth installing wooden patio pergolas yourself?
Yes, it’s worth installing wooden patio pergolas yourself if you have the time to work at a leisurely pace and don’t need to hire a team for every stage. You’ll usually save on labour costs, and you can put that money towards better-quality timber, sturdier fixings or a more practical roof.
Do-it-yourself assembly keeps these costs down, but you’ll need to factor in the cost of tools and materials: post anchors, structural screws, angle brackets, anchor adhesive, a spirit level and a drill.
The second benefit is less obvious: by doing it yourself, you can tailor the details to suit life on the terrace. You can increase the headroom, move a post, or leave space for roller blinds, shutters or side panels to be fitted later. With a ready-made installation, the team often sticks strictly to the plans, and the terrace can end up being less flexible in terms of how it’s used.
How should you prepare the ground to ensure that wooden patio pergolas remain stable for years to come?
For wooden patio pergolas to stand securely, two factors are crucial: the correct anchoring of the posts and a level, load-bearing base. The safest option is to rest the posts on steel footings set in concrete, rather than placing the timber directly on paving stones or the ground.
Definition in practice: the foundation for a pergola must be able to bear wind loads and the weight of the structure without deformation.
For a typical 3×4 m pergola with 4 posts, posts with a cross-section of 12×12 cm or 14×14 cm are used, whilst for larger structures measuring 4×6 m, 16×16 cm or 18×18 cm posts are often used. The larger the cross-section, the greater the structure’s resistance to wind gusts and twisting.
The most common foundation solutions:
- Concrete footings for each post (e.g. 30×30×80 cm) with an adjustable anchor. They provide the best stability and allow the structure to be levelled, even on sloping ground.
- A concrete screed or ring beam with embedded anchors. This works well for terraces built on a concrete slab and in places where you’re planning to lay concrete under the floor anyway.
- Fixing to an existing terrace slab using chemical anchors. This works, but only if the slab is of sufficient thickness and in good condition, with no cracks or voids.
If you have a decking terrace built on joists, do not treat it as a foundation. Wooden patio pergolas should be set on concrete, and the decking boards should simply wrap round the posts, leaving a gap to allow for the wood to expand and contract and for water to run off. It’s a small detail, but it often prevents the structure from rotting and warping after 2–3 seasons.
What type of wood and what strength grade are used to make wooden patio pergolas for self-assembly?
Wooden patio pergolas for self-assembly are best made from KVH structural timber or GL24-grade BSH laminated timber. These materials are more dimensionally stable than ordinary sawn timber, are less prone to cracking, and make it easier to maintain vertical and horizontal alignment without a struggle on site.
Straightforward definition: KVH is solid, kiln-dried and planed timber, joined lengthwise using micro-finger joints; BSH is laminated timber that retains its straightness very well. This is a major advantage when assembling the structure yourself, as the components fit together without the need for constant wedging.
What should be considered the practical minimum when planning cross-sections:
For a 3×4 m pergola with a lightweight roof (e.g. slats or polycarbonate), the following structure is often sufficient: 12×12 cm posts, perimeter beams 6×14 cm, and rafters 4.5×9 cm spaced approx. 40–60 cm apart. For a larger 4×6 m pergola, particularly in windy locations, it makes sense to use posts measuring 14×14 cm or 16×16 cm, perimeter beams of 8×16 cm and rafters of 6×12 cm.
If you are planning a heavier roof structure (e.g. glass, solid boarding), the cross-sections will need to be larger, as the weight and stiffness requirements increase.
Type of timber: most commonly structural spruce (KVH/BSH) due to its availability, stability and good compatibility with wood preservatives and oils. Larch is sometimes chosen for exposed elements because of its attractive grain, but in practical construction terms, it is the quality of the drying process and the stability of the timber that matter, not the name of the species itself.
To ensure that wooden patio pergolas are easy to assemble, pay attention to how the components are prepared: bevelled edges, pre-drilled holes at key points, and a well-designed joining system. The assembly process itself then feels more like putting a structure together than carving it out on the spot.
Which mistakes made when installing wooden patio pergolas yourself are the most costly?
The most costly mistakes when assembling wooden patio pergolas yourself are poor anchoring of the posts, failing to include diagonal braces, and underestimating how the wood will behave outdoors. It is precisely these factors that cause the structure to tilt, creak, develop cracks at the joints and lead to problems with closing the movable covers.
Problem definition: a pergola on a terrace is exposed to sun, rain and wind, so it must have sufficient rigidity whilst allowing for the material’s natural movement. If you assemble everything too rigidly, without spacers and without monitoring humidity levels, the structure’s geometry may become distorted by the end of the season.
The most common mistakes are:
- A post installed without an adjustable base and not cut off from the water. The wood absorbs moisture from below, and after 2–4 years, deterioration begins at the most critical point.
- Lack of bracing or connectors that are too flimsy. The pergola stands firm on a windless day, but at the first stronger gusts it begins to sway and the joints start to come loose.
- Incorrectly selected screws and failure to pre-drill. A structural screw must be the correct length and diameter, and in harder materials, pre-drilling helps to prevent cracking and fibre tear-out.
- Failure to check the diagonal measurements whilst screwing. A misalignment of just 5–10 mm at the start is enough to cause the rafters to be out of alignment at the end, or for the roof line to be out of alignment.
Then there’s the issue of safety: ladders, working overhead, heavy beams. With a 4×6 m pergola, a beam can weigh so much that it becomes risky without a second person and assembly supports. A sensible compromise is to prepare the ground yourself and then assemble the structure with a partner on the day of installation.
How can you protect and maintain wooden patio pergolas after installation to ensure they retain their appearance?
Once installed, wooden patio pergolas need to be maintained regularly, but without going overboard: as a rule, they should be inspected once a year and the finish refreshed every 2–4 years, depending on exposure to sun and rain. The most important thing is to protect the ends of the timber, cut surfaces and joints, as this is where moisture penetrates most quickly.
The definition of maintenance in practice: it is not about painting for the sake of colour, but about maintaining a barrier that protects against water and UV radiation. If the pergola faces south and is exposed to strong sunlight, the coating will wear out more quickly. On the north-facing side, you’ll more often have to deal with periodic damp and mould.
How to go about this sensibly after installation:
After the first season, check the joints: tighten the screws, check the anchors, and check for any scratches in critical areas. Next, inspect the surface: if the water stops sparkling and the wood becomes dull and rough, it’s a sign that it’s time for a refresh.
With oils and wood stains, it is usually sufficient to clean the surface, lightly sand it down and apply another coat, without stripping it back to the bare wood.
A well-built structure has a long service life. With KVH/BSH structural timber, when properly raised off the ground and regularly maintained, we can easily expect 15–25 years of use, and often longer. Horizontal elements and the edges most exposed to the sun age the quickest, so it is worth paying the most attention to these areas.
If you want to approach the matter calmly and technically, whilst ensuring that form does not take precedence over substance, a good option is to order a kit ready for assembly and carry out the work at your own pace.
If you need help choosing cross-sections, anchorages and safety measures, take a look at Dąb Gaj Wood and think of it as a consultation with someone who assembles these things on a daily basis in real-life terrace conditions, rather than just on paper.
Read also: What are the benefits of wooden pergolas for patios in shaded areas?
Frequently asked questions
How long does it take to assemble a 3×4 m patio pergola yourself?
With ready-made, pre-cut components and a simple roof structure, many people can assemble the structure in 1–2 working days with a team of two. The most time is usually spent on preparing the ground and levelling the footings precisely, as the geometry of the whole structure depends on this. If you’re building the point footings from scratch, allow extra time for groundworks and for the concrete to set.
What tools do you actually need to assemble a pergola?
In practice, you will need a drill/driver, a hammer drill or a rotary hammer for anchoring in concrete, a spirit level (preferably 120–200 cm) and a tape measure. To position the structure, you’ll find clamps, a square and temporary supports useful for keeping the structure vertical whilst screwing it together. If the components aren’t pre-prepared for assembly, you’ll also need a wood saw, as well as tools for chamfering and securing the cuts.
Do I need a planning permission or a notification for a patio pergola?
It depends on the dimensions, the method of foundation and local regulations, so it’s worth checking the requirements with your local authority or a designer before you start. The problem most often arises with larger structures, permanent roofing and a permanent connection to the ground, as the structure may then be treated as a building. If you want to avoid costly alterations, sort out the formalities before laying the foundations and ordering materials.
For a DIY installation, is it better to choose KVH or BSH?
KVH is a good choice if you want stable, simple components at a reasonable price and aren’t planning on very large spans. BSH generally offers even better straightness and predictability, which makes assembly easier without having to struggle to get things plumb and level, particularly with larger cross-sections. In practice, many people use BSH for the main beams and KVH for the remaining components to optimise costs.
How should you plan the anchoring so that the posts don’t absorb moisture from below?
The safest option is to rest the posts on adjustable steel bases fixed to the concrete, so that the timber does not stand in water and is raised off the ground. It is also crucial to protect the ends of the timber and all cut surfaces, as these are the areas where moisture penetrates most quickly. If you have a decking laid on joists, transfer the load from the pergola to the concrete, and leave the decking boards as a finishing layer with an expansion gap around the post.