


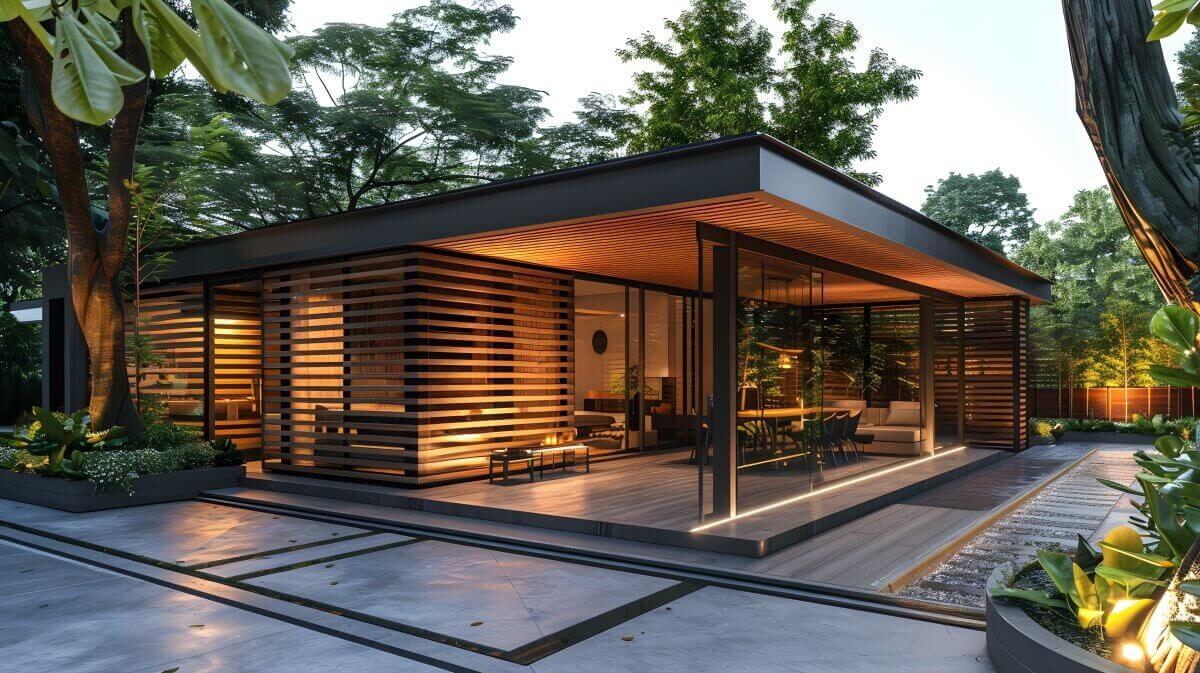
Wooden pergolas for terraces in shaded areas primarily provide shelter from the wind, stabilise the microclimate and allow the terrace to be used practically from spring to autumn, even when there is no sun. The post-and-beam structure forms a frame for the roof and side screens, thereby reducing draughts, dew and dripping from trees, whilst not enclosing the space like a gazebo. The pergola’s beams facilitate the installation of lighting and other fittings, which enhances the usability of the relaxation area after dark.
Do wooden pergolas on a terrace make sense in the shade or partial shade?
Wooden pergolas on a terrace in shady spots can make a bigger difference than many people realise: they organise the space, provide shelter from the wind and create a cosy spot to relax, even when the sun is few and far between.
At Dąb Gaj Wood, we often design such structures precisely where the terrace faces north, next to tall trees or amongst other buildings, because a well-chosen pergola is not just for providing shade.
If you plan to wooden pergolas for the terrace In a spot that is in partial shade for most of the day, what matters most is not so much the amount of shade they provide, but how they enhance comfort: they reduce draughts, allow for the installation of screens and lighting, and help keep the terrace visually tidy.
What are the benefits of wooden pergolas for patios in shaded areas?
Wooden pergolas on a shaded terrace primarily help to regulate the microclimate: they block draughts, provide side shelter and allow you to warm up or brighten the seating area. In practice, this is a way of ensuring that a terrace, which is currently cold and rarely used, comes to life from spring through to autumn.
A pergola is a lightweight post-and-beam structure, usually anchored to point foundations or concrete footings, which forms a frame for a roof (solid or openwork) and side screens. In shady areas, it is valued for the way it controls wind and humidity, whilst allowing for enclosure without closing off the space, as is the case with a typical gazebo.
The most common, practical benefits of a shaded terrace are as follows:
- Wind protection and the ‘warmer zone’ effect: side screens (e.g. blinds or panels) can improve perceived comfort even at temperatures of 10–15°C, as they stop the draught from blowing across your back.
- Improved functionality after dark: it’s easy to arrange LED lighting, wall lights or sockets along the beams, meaning the terrace is no longer dependent on sunlight.
- Aesthetics and order: wooden pergolas on the terrace visually tie together the façade, the floor and the garden, conceal less attractive views (such as a neighbour’s fence) and define a relaxation area.
- Option to add a canopy: in the shade, we’re more likely to have to deal with water dripping from trees and dew, so a canopy (e.g. slats or a panel) offers greater benefits than simply providing extra shade.
An important point from the workshop: in shaded areas, wood retains moisture for longer, so the structure must be well designed to allow for water drainage and ventilation, rather than focusing solely on its appearance.
How do you choose wooden pergolas for a semi-shaded terrace to prevent damp and a slippery floor?
Wooden pergolas for semi-shaded patios should be chosen to minimise damp: gaps, slopes, an overhang and effective drainage are key. In the shade, it is not the sun that causes damage; rather, it is stagnant moisture and a lack of ventilation that do the most damage.
Practical definition: a shaded patio pergola should act as a canopy and a screen, but not as an enclosed box. That is why a structure with a louvre roof or a panel roof with a controlled overhang is often preferable to a dense latticework that traps leaves and water.
What I look out for when choosing dimensions and layout:
- Headroom: a comfortable minimum is around 220–240 cm beneath the beam, whilst for areas with a roof and lighting, it’s better to aim for 240–260 cm to avoid feeling cramped.
- Post spacing and stability: for typical terraces, a spacing of 3–4 m works well; 18×18 cm posts provide rigidity and ensure the structure remains stable in windy conditions.
- Overhang and slope: even an overhang of 10–20 cm can help prevent water from seeping onto the floor, and a sloping roof (or a gutter to channel water away) is a must-have under trees.
If the terrace is in the shade for most of the day, it’s also worth considering a light-coloured floor and adding extra lighting under the pergola. These are simple measures, and the result is that the space doesn’t look perpetually damp and dark.
What type of wood and what grade are used to make wooden pergolas for patios in shaded areas?
Wooden pergolas for shaded terraces are best constructed using structural timber with predictable behaviour and stability, such as KVH or BSH; for larger spans, BSH GL24 works particularly well. In shaded areas, the key is not that the timber is harder, but that it is straight, structurally glued or joined, and well-protected, as moisture will be more likely to accumulate.
Definition in a nutshell: KVH is solid, kiln-dried and planed structural timber, whilst BSH is laminated timber, which retains its dimensions better and allows for more reliable beams over longer lengths.
In practice, on a terrace you’ll most often come across 12×12 cm or 14×14 cm posts, but for premium projects and where there are heavier loads, it makes sense to opt for 18×18 cm posts, as the structure is then more stable and less prone to twisting.
Wood species? Construction spruce (KVH/BSH) is most commonly used, as it offers good value for money and takes well to wood preservation treatments. Larch is sometimes chosen for its appearance, but in load-bearing structures it is the quality of the material, the drying process and the impregnation that matter, rather than the name of the timber species itself.
When it comes to shade, the installation details are crucial: keeping the timber off the ground on steel feet, ensuring there are no pockets for water to collect at the joints, and providing appropriate finishes for the beams. These factors are the main ones that determine whether the pergola will still look good after 5–10 years, or whether it will start to develop dark discolouration caused by damp.
How much do wooden pergolas for a shaded patio cost, and what is the step-by-step installation process?
Wooden pergolas for shaded terraces usually cost about the same as those for sunny terraces, but they more often include moisture-proof features: better roofing, guttering, side panels and more robust foundations. The final price depends on the dimensions, roofing, finish and side panels.
The definition of cost in practice: the price isn’t just the timber, but also the steel fixings, foundations, surface protection, transport and assembly. In shaded areas, I tend to recommend a roof that effectively drains water, as this is what makes the investment pay off in day-to-day use.
What does the installation process involve, so that the customer knows what to expect:
First, measurements are taken and the conditions are checked: the slope of the terrace, the location of the foundation footings, the route of the guttering, and any interference with the roof overhang and the patio doors. Next, the dimensions and heights are determined, as well as whether the pergola will be free-standing or wall-mounted.
The next stage involves point foundations or concrete footings. In practice, for an 18×18 cm post, sturdy steel anchors are used and the timber is raised above floor level so that it does not stand in water after rain. Next, we erect the posts, cross-beams and joists, brace the whole structure, and only then do we fit the roof and any side panels.
Finally, it’s time for the finishing touches: waterproofing and staining, finalising the details, adjusting the moving parts, and the final inspection. A well-built pergola does not creak at the joints, does not squeak, and has no areas where water collects after rainfall.
How often should a pergola in the shade be maintained?
In the shade, inspections are carried out more frequently, as the wood takes longer to dry: a seasonal check and a fresh coat of paint are usually required every 2–4 years, depending on exposure to rain, proximity to trees and the type of finish. If the pergola has a roof and the wood isn’t regularly exposed to the elements, this interval can be extended.
If you want a pergola in a shady spot to be truly comfortable and durable, it’s worth treating it as a piece of landscape architecture rather than merely a decorative feature: plan for water drainage, ventilation and sensible shading.
If you need help choosing the dimensions, roofing and finish for a specific terrace, please get in touch with Dąb Gaj Wood and we’ll take it all in our stride, from measurement to installation.
Read also: Are wooden balcony pergolas suitable for small balconies?
Frequently asked questions
How long does it take to build a pergola for a terrace in a shady spot?
It usually takes 2–6 weeks from the initial measurements and planning to installation, depending on the season and the scope of work (roofing, side panels, electrical work). The on-site installation itself usually takes 1–3 days for a standard patio pergola. In shaded locations, there is sometimes an additional stage involving the preparation of drainage or foundations, which may extend the work by 1–2 days.
How do you prepare the ground for a pergola on a semi-shaded terrace?
The most important thing is to anchor the posts securely to concrete bases or point foundations, and to raise the timber on steel bases so that it does not stand in water. It is worth checking the floor gradient and planning for water drainage (gutter, drain, direction of flow), as dampness lingers longer in the shade. Before installation, it is also a good idea to clear the area of leaves and ensure the team has access to the drilling and concreting sites.
When it comes to shade, is it better to choose a louvre canopy or a solid canopy?
In the shade, a canopy often offers greater benefits, as it effectively reduces dripping from trees, dew and rain – in other words, a solution with controlled water drainage. Louvres are ideal if you want to regulate airflow and light, but you need to ensure proper drainage and keep them clear so that leaves do not accumulate. For a terrace under trees, a more complete canopy with an overhang and guttering usually keeps the floor drier and less slippery.
Which type of timber should you choose for a pergola in the shade: KVH or BSH?
For standard pergola dimensions, KVH is an excellent choice, as it is kiln-dried, planed and offers predictable performance. If you’re planning larger spans, a heavier roof structure or require maximum stability, BSH (e.g. GL24) is more commonly recommended. In shaded areas, proper protection and installation details are also crucial, as these are the factors that most effectively minimise problems with damp and discolouration.
Does a pergola on a shaded terrace require more frequent maintenance?
Usually, yes, because in the shade, wood takes longer to dry and is more frequently exposed to damp, which encourages dirt build-up and discolouration. In practice, it’s worth carrying out an inspection every season, and planning to refresh the finish every 2–4 years, depending on the roofing and exposure to rain. If the structure is raised well above the ground and has a proper drainage system, maintenance tends to be less frequent and easier.